How to use Filmustage
So, let’s say you’ve decided to make your own film. You have a brilliant script, and what you need now is to break it down to be able to plan your production, create a shooting schedule, cast actors, book...


Hi! Let’s say you’ve decided to make your own film. You have a brilliant script, and you need to break it down to plan your production, create a shooting schedule, cast actors, book locations, and so on. How to make a script breakdown using the Filmustage app? In this post, we are going to talk about that in detail.
Filmustage is based on the artificial neural network trained to search for elements in the script text and distinguish them depending on the context. Shortly speaking, it will do most of the job for you.
Start working
First things first, you need to go to https://app.filmustage.com/ and create your own account. Once you've done this, the app will suggest guiding you through the interactive tutorial. We recommend you review the tutorial to help you get comfortable with the app and quickly learn how to use it.
To start working on your script, click the Create Project button. You can hardly miss this button: it is on the top left of your screen, and it is bright purple! After clicking this button, the pop-up window will appear, where you can upload your script file in .pdf or .fdx format (simply drag and drop the file to the marked area). You can also name your project in the same window and add a description with a cover picture. Once you are done, you just need to click Create Project (it is bright purple; it's hard to miss).
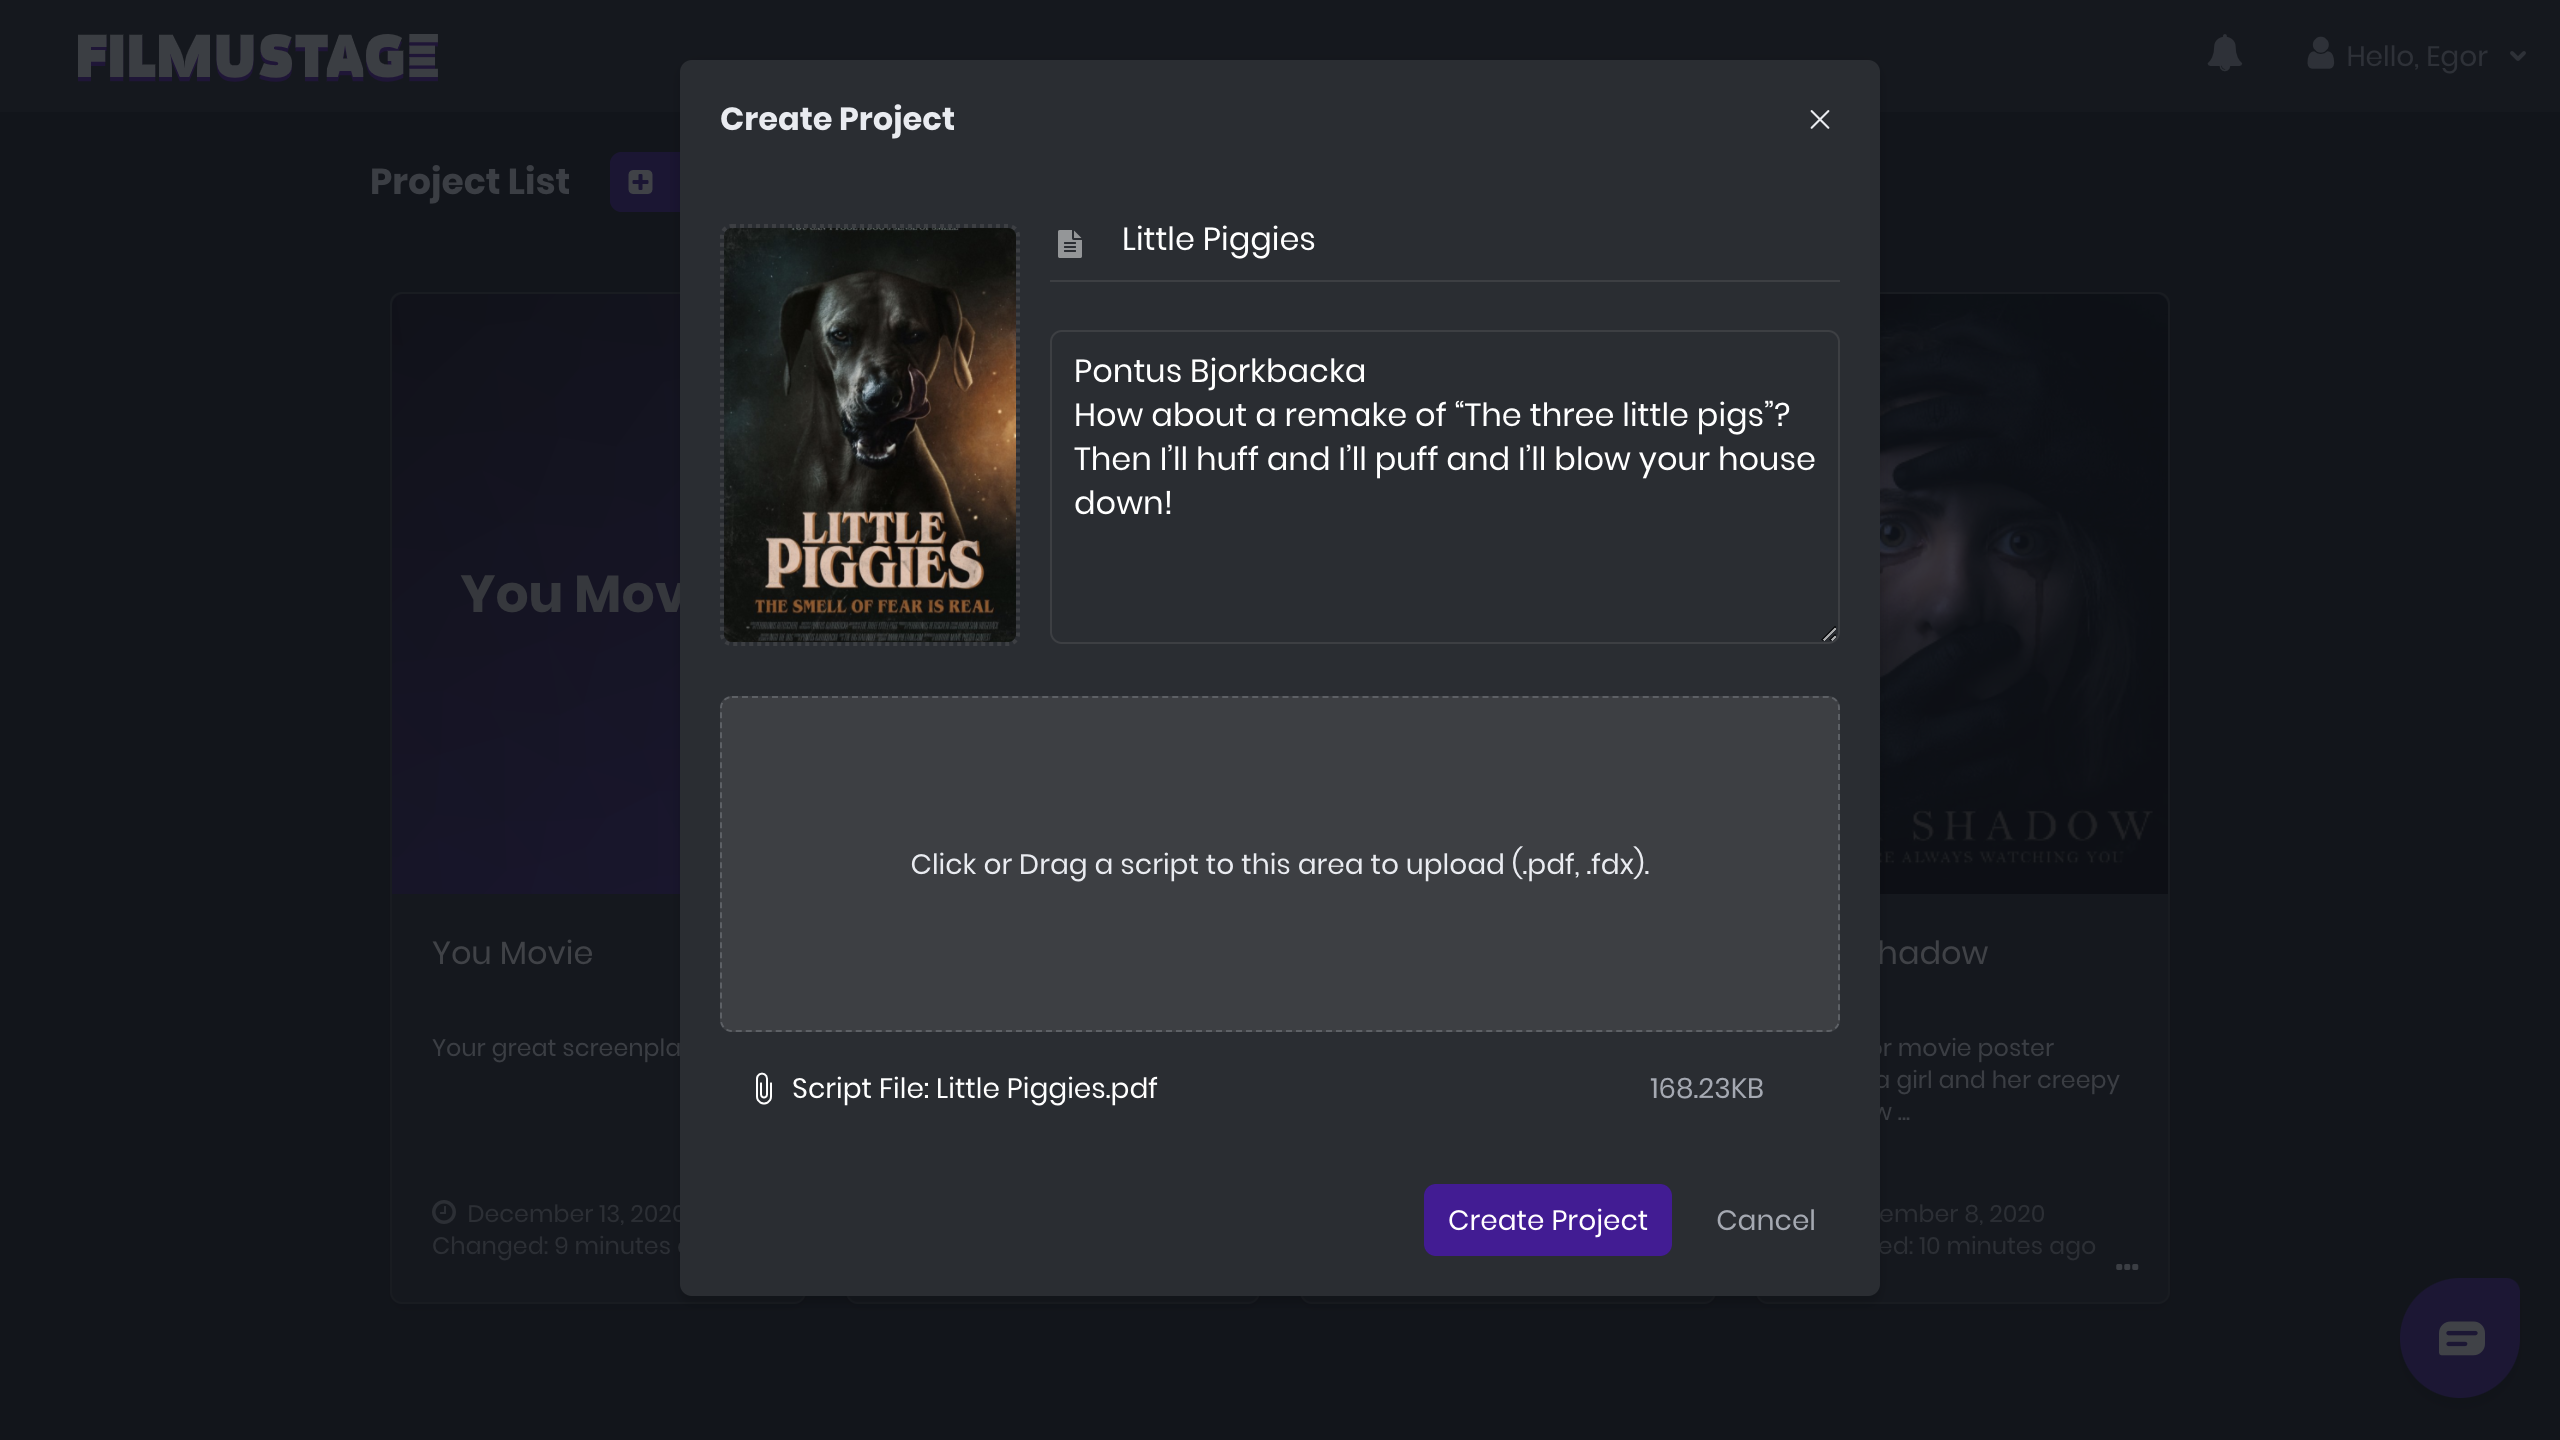
And after that… Well, you may be surprised, but this is it. Right after you hit Create Project, the App will automatically break down the script you've uploaded, so what you see next is the prepared script breakdown. Yes, it took just a couple of seconds! No, you are not dreaming. This is true, and you can believe your eyes. 😂
Breakdown screen
It's all there, but you can look closer at the breakdown and adjust it to your needs.
In the central part of the screen, you can see the script text itself. It is already divided into 1/8ths for your convenience.
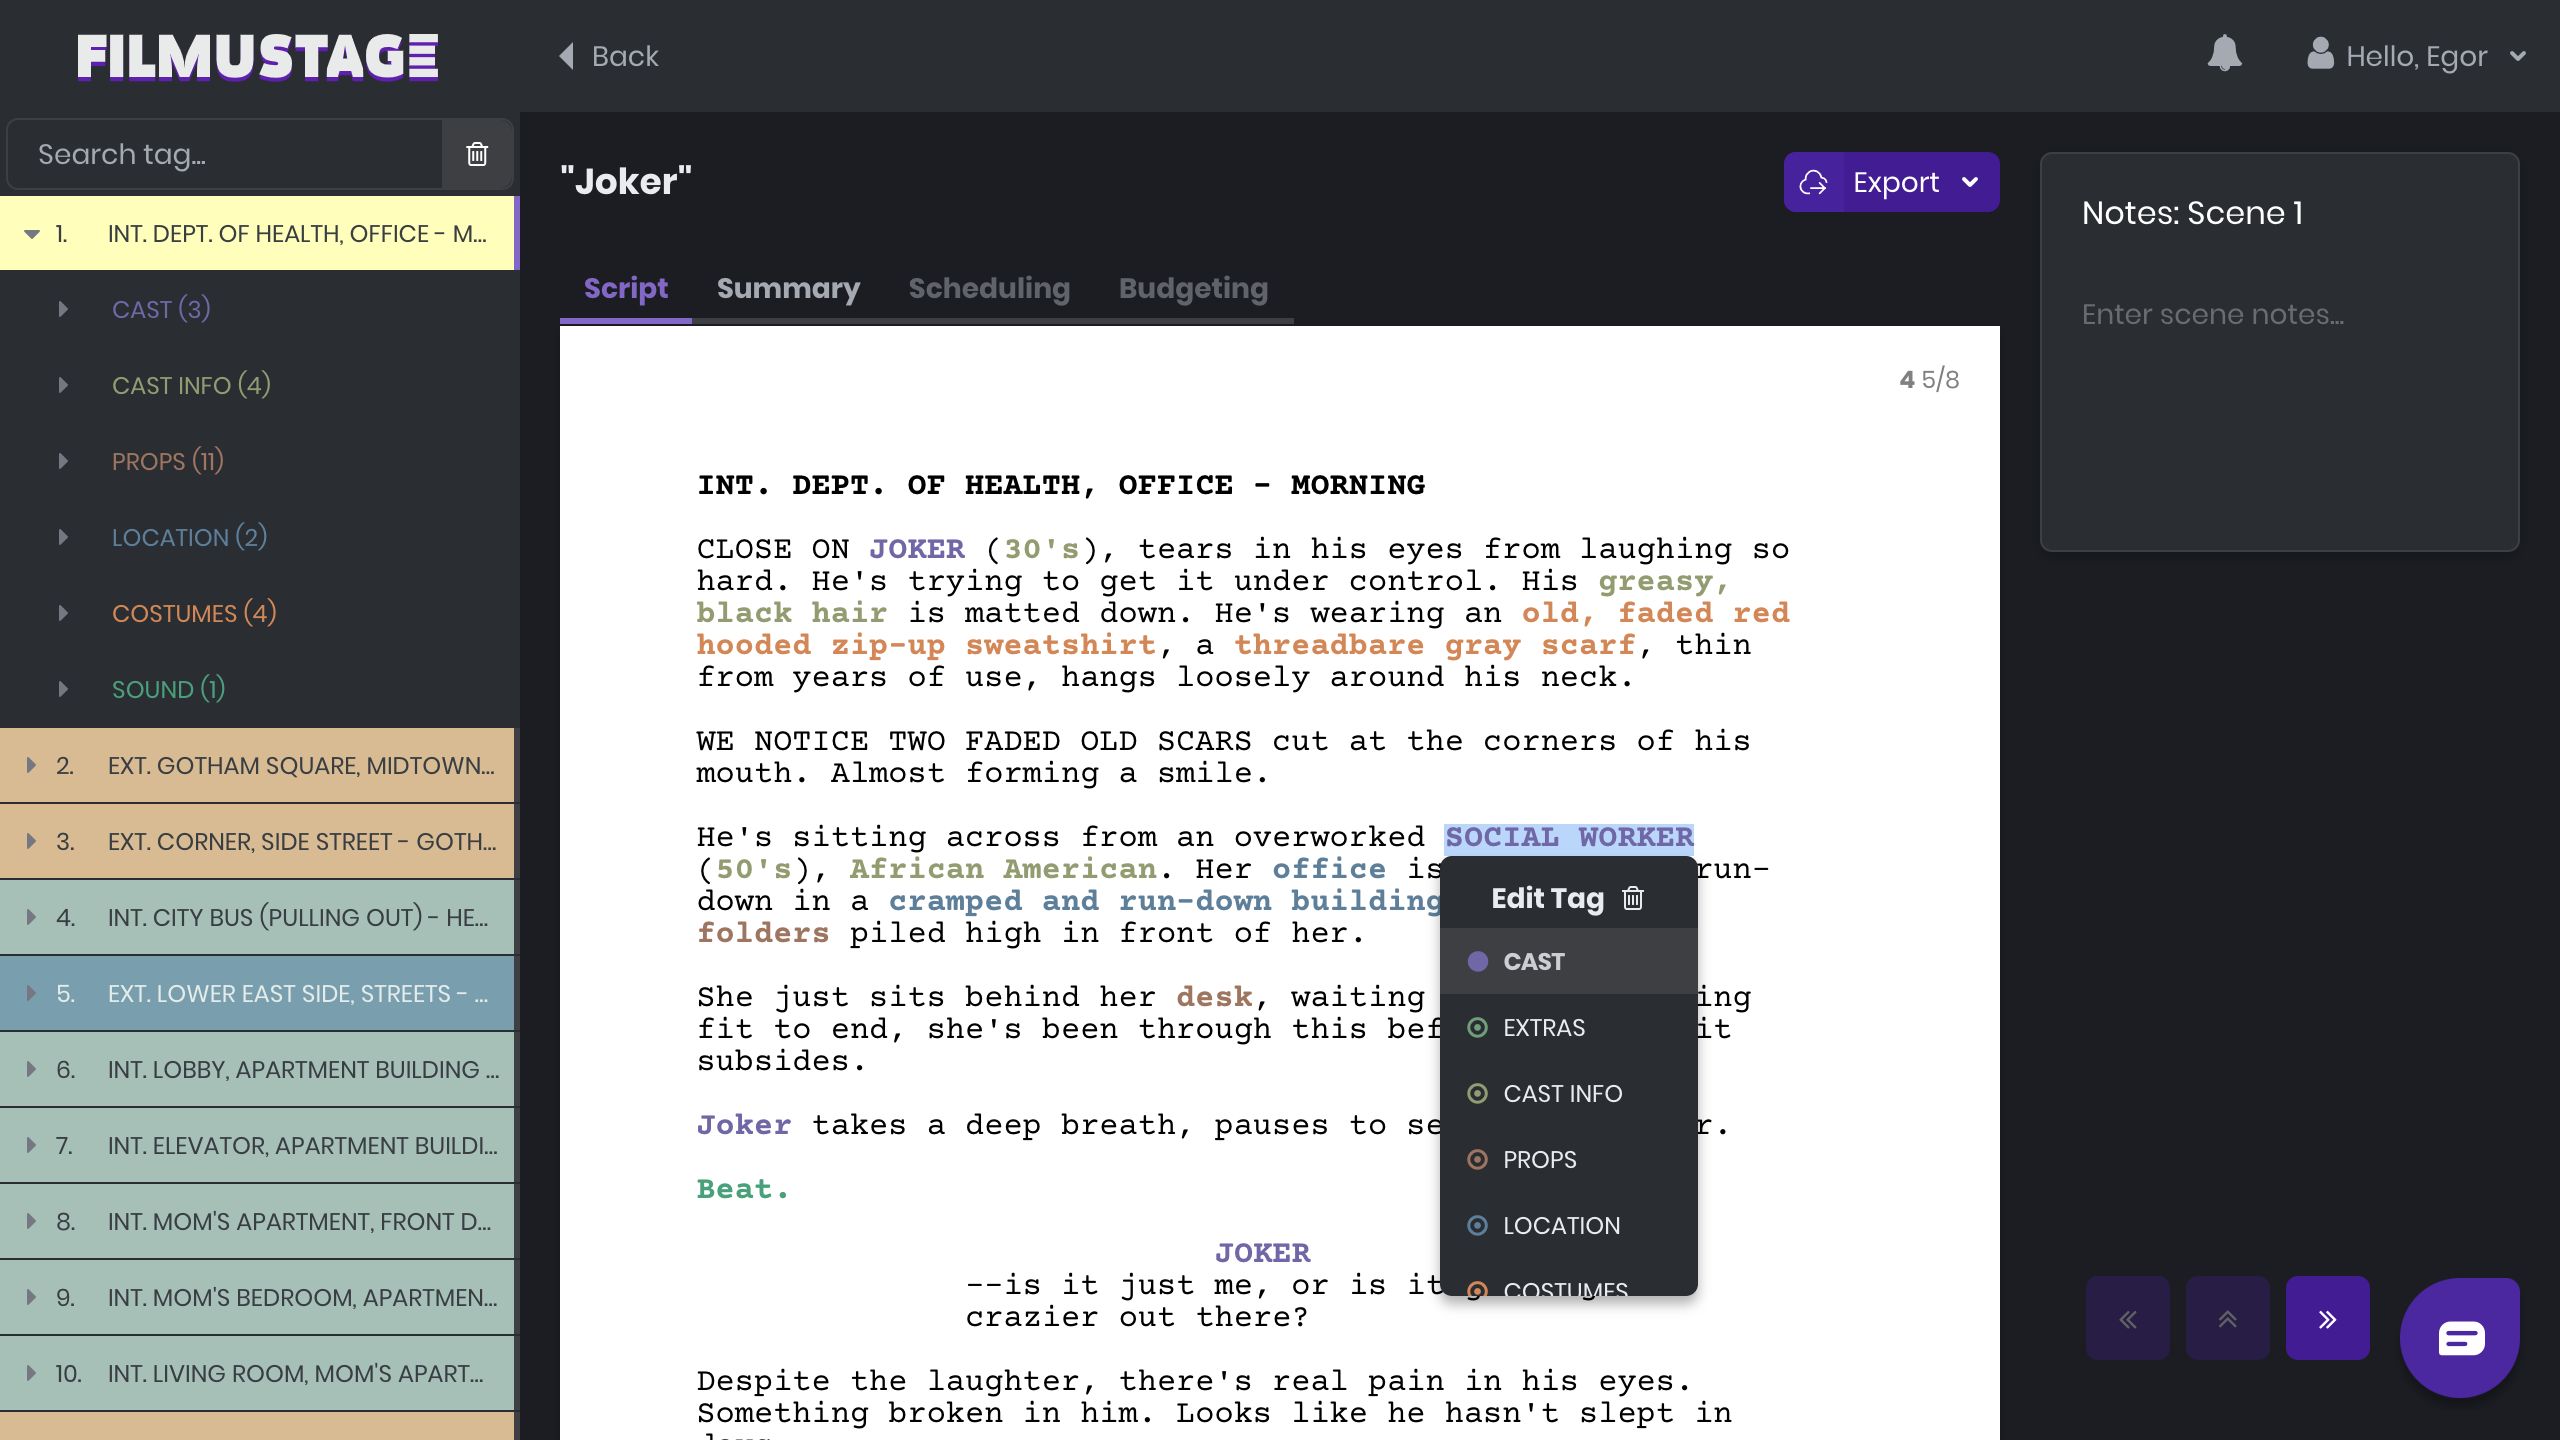
On the left, you will see a list of all the scenes you have in your script. The scenes are color-coded and marked depending on whether they happen inside or outside (INT/EXT), during the day or at night (DAY/NIGHT). Just click the scene title to open its category and tag tree.
After clicking it, below the scene title, you will see the list of tag categories the program found in just a few seconds. All the characters, locations, props, costumes, etc. – everything is already there.
You can click any category and see the list of elements that belong to this category. You can also click any element in the text to open the drop-down categories list and add this element to one of the categories (or remove it from the list), or change/remove the category if this element is already tagged. Soon, you will be able to add your own custom categories as well. We are working on it right now.
Above the scenes list on the left, you can find the search field. This is amazingly helpful: you can type any tag name there, and the App will find and show you all the scenes in the script that contain this tag.
To the right of the script breakdown page, you can add any notes to the current scene. Type whatever you want there, and the App will automatically save your comments. You can find all the notes later on the Summary tab.
App navigation
On the right, under the notes window, there are some functional buttons to move between the scenes or scroll to the top of the page. You can do the same thing using hotkeys as well:
- Shift + left to return to the previous scene
- Shift + right to move to the next scene
- Shift + up to scroll to the top of the page
There are the following primary tabs in your workspace that you can use:
- Script – the script text we have just discussed.
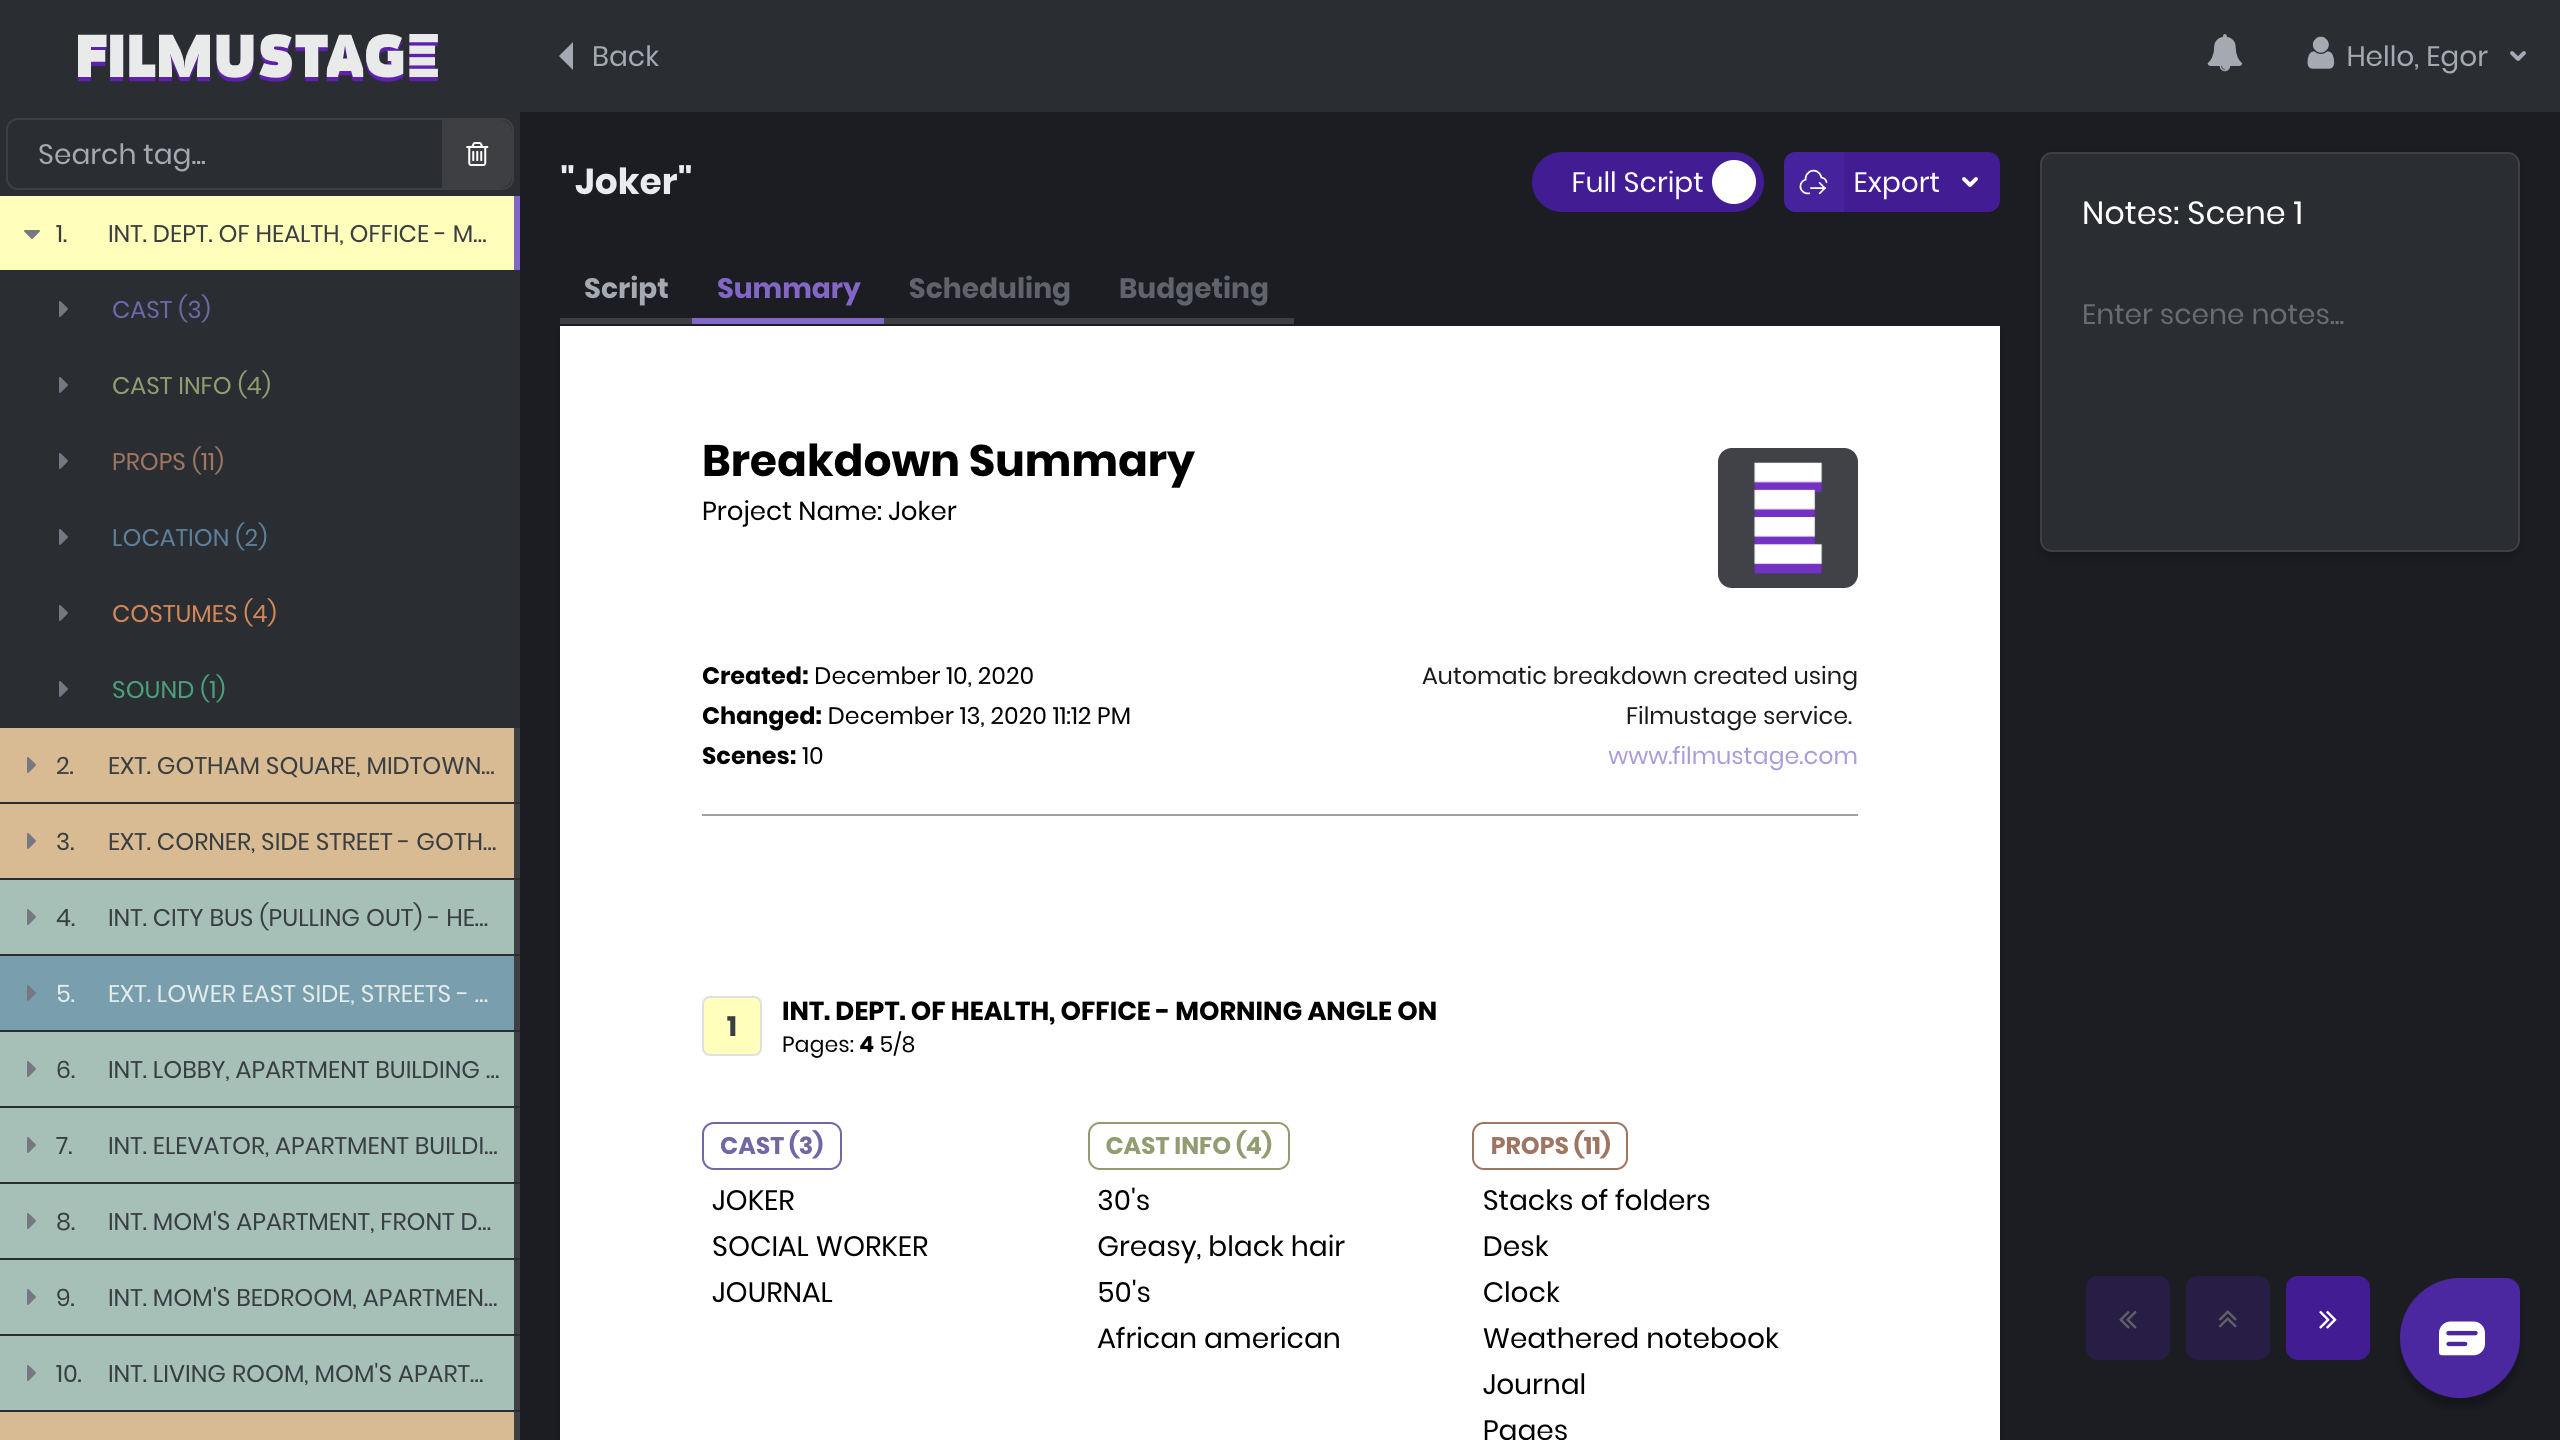
- Summary – report that includes all categories and elements mentioned in every scene. When you are here, you can switch between the whole script summary and scene-by-scene view (Full Script/One Scene toggle). The summary of the entire project can be saved as a PDF report file.
- Scheduling and Budgeting tabs will be added here soon.
Export formats
And finally, when you are OK with the results of your script breakdown, you can export it in multiple formats. Filmustage currently supports the following formats:
- Movie Magic Scheduling. SEX file format. Also works with Gorilla Scheduling.
- Spreadsheets. CSV file format. You can import this file into Google Sheets.
- PDF. You can save the report for the whole script or only one scene. Use the Full Script/One Scene toggle to switch between these modes.
And you’ve got it! You have the complete script breakdown and reports generated. Filmustage can do it much faster than any other existing script breakdown tool and, of course, way faster than if you had done it manually.
Filmustage is also easily adjustable and customized: if you need to make any changes in categories, elements, etc., it will only take a few moments to update the summary, so there is no need to rewrite or correct anything in every scene.
Now, you are good to go to the next pre-production steps and start scheduling your shooting!